A moss pole is an essential support structure that allows climbing and vining plants to thrive naturally. From monstera to pothos, a moss pole helps mimic their natural environment, encouraging healthy growth and larger foliage. We will walk you through everything you need to know about making a DIY moss pole, including materials, garden tools, step-by-step instructions, and even how to make variations such as self-watering or D-shaped moss poles.
Why Use a DIY Moss Pole for Climbing Plants
Climbing plants in the wild use tree trunks and rough surfaces to support vertical growth. Indoors, they need similar structures. A DIY moss pole for climbing plants provides that structure, promoting aerial root attachment, better water absorption, and vertical aesthetics.
Key Benefits:
- Enhances vertical growth: Moss poles provide support for climbing plants to grow upward, mimicking their natural habitat. This encourages a healthy structure, prevents sprawling, and allows plants to utilize vertical space efficiently, especially in indoor gardening setups.
- Improves leaf size and health: When climbing plants can grow vertically with adequate support, their leaves often become larger and healthier. A moss pole supports stronger root anchoring and nutrient absorption, both of which lead to more robust foliage.
- Maintains tidy plant structure: Without a support system, climbing plants can look untidy or droop over time. A moss pole helps keep vines organized and upright, maintaining a clean, aesthetic appearance in your home or garden.
- Provides humidity through moss: Sphagnum moss retains moisture exceptionally well. When wrapped around a pole, it keeps the environment humid around the aerial roots, which improves root health and encourages quicker plant growth.
- Cost-effective and customizable: Making your own moss pole allows you to control the size, shape, and materials. It’s far cheaper than purchasing pre-made versions and can be customized for various plants and pot sizes.
DIY Moss Pole Materials Checklist
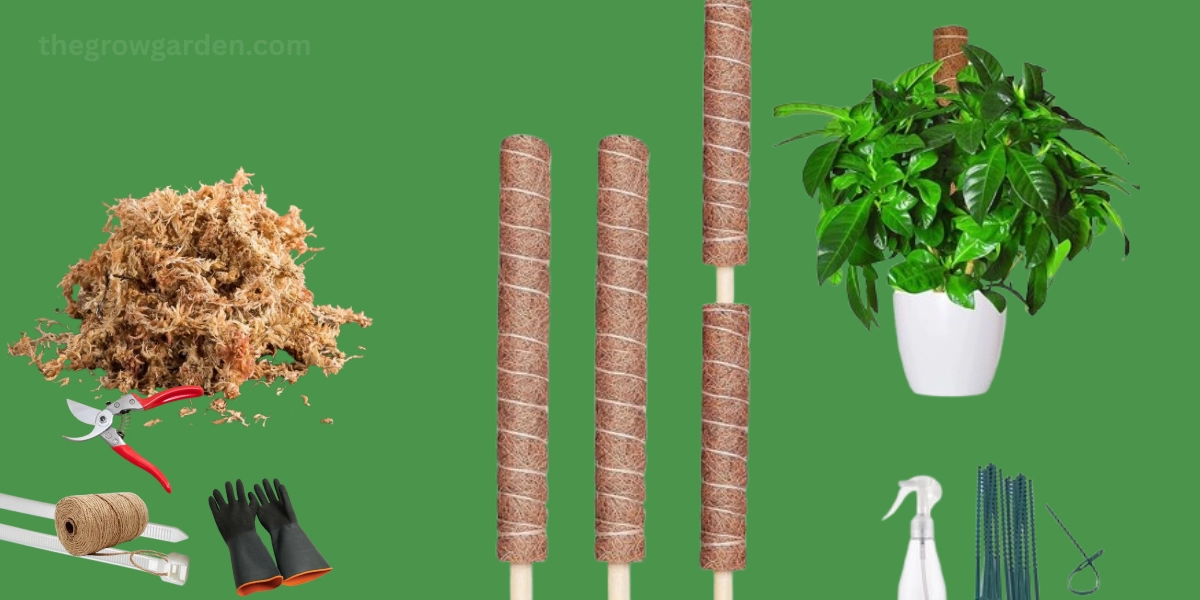
Before you begin, gather the following DIY moss pole materials:

Basic Supplies:
- PVC pipe or wooden stake: These form the core of the moss pole. PVC is lightweight and waterproof, ideal for long-term use. Wooden stakes give a more natural aesthetic but may decay over time.
- Sphagnum moss: This moss is used to wrap around the core, offering moisture and a gripping surface for aerial roots. It’s available at most garden centers and retains water well, promoting root development.
- Garden twine or zip ties: These are used to secure the moss around the pole. Twine blends better aesthetically, while zip ties are quicker and more secure.
- Chicken wire or mesh wrap: Helps keep the moss in place, especially when wet. It also provides a framework that climbing plants can cling to easily.
- Scissors and gardening gloves: Scissors are needed for cutting twine and mesh. Gloves protect your hands from sharp wire or spiky moss.
- Optional: plastic backing, plant tape, humidifier: These extras help protect surfaces, attach plants neatly, or increase ambient humidity around the plant.
How to Make DIY Moss Pole
Let’s build an easy DIY moss pole perfect for beginners.
Step 1: Choose the Core

Start by choosing a central rod or pole. A PVC pipe is durable and water-resistant, ideal for moist environments. Alternatively, a wooden dowel provides a natural aesthetic. Select a length based on your plant’s current height and projected growth—typically between 1 to 4 feet.
Step 2: Soak the Moss

Submerge the sphagnum moss in a bucket of warm water for 15–30 minutes. This makes the moss more pliable, easier to handle, and boosts its water retention. Soaked moss also stays firmly in place and provides instant humidity for your climbing plant’s aerial roots.
Step 3: Wrap with Moss

Place the soaked moss evenly over chicken wire or mesh laid flat. Carefully roll or fold it around the core structure (PVC or wood). This layering ensures full coverage and creates a soft, natural surface for roots to cling to.
Step 4: Secure the Moss

Use garden twine or zip ties to fasten the moss around the pole. Wrap tightly enough to hold the moss securely, but not so tight that it compresses or damages the moss. Work from bottom to top to keep everything snug and stable.
Step 5: Anchor in Pot

Insert the base of the moss pole into the pot, pushing deep into the soil for stability. If necessary, add more potting soil or decorative stones around the base to prevent it from tipping over as the plant climbs.
Advanced Ideas and Custom DIY Moss Poles
DIY Moss Pole with Chicken Wire
This method uses chicken wire wrapped around a core (PVC or wood), filled with soaked moss. It’s ideal for creating a sturdy structure that holds moss well. Chicken wire also gives aerial roots additional surfaces to grip as they grow.
DIY Moss Pole with Plastic Backing
For indoor use, especially on wooden floors or furniture, you can add a plastic sheet as a backing. This prevents excess moisture from seeping out of the moss and damaging nearby surfaces. It’s especially helpful when using a wooden core, which might absorb water.
DIY Self Watering Moss Pole
A self-watering moss pole includes a hidden water reservoir or internal tubing. You can insert a perforated tube inside the pole that slowly releases water to keep the moss damp. Another method involves using a wicking string that draws water from a bottom reservoir to the moss.
DIY Sphagnum Moss Pole
This version uses only sphagnum moss as the wrap material. It holds moisture effectively and is ideal for moisture-loving climbers like monsteras. Pure sphagnum moss poles are lightweight and provide excellent root support without needing extra wraps.
DIY D Shaped Moss Pole
D-shaped poles use a half-circle pipe or backing to create a flat rear surface. These fit snugly against pots or walls and are great for saving space. They also provide a broader front surface for moss, improving plant attachment.
DIY Bendable Moss Pole
Made using flexible materials like bendable PVC or garden mesh, bendable moss poles let you create dramatic shapes or curves. These are perfect for creative plant displays or to guide plants in specific directions.
Sizing Guide: From Small to Large Moss Poles
DIY Small Moss Pole
Small poles, about 1 to 2 feet tall, are best for small pots or young plants. They are lightweight, easy to build, and can be used temporarily before upgrading to larger ones as your plant matures.
DIY Large Moss Pole
Large moss poles range from 3 to 6 feet in height and provide long-term support for vigorous climbers. They’re essential for mature monsteras, philodendrons, and similar plants with fast vertical growth. A stable base and secure anchoring are crucial.
DIY Cheap Moss Pole Ideas
You don’t need to spend much to build a moss pole. Reuse old household items such as broomsticks, curtain rods, or leftover chicken wire. Moss can sometimes be collected from your backyard (ensure it’s pest-free). Instead of buying twine, use strips of old cloth or pantyhose. These materials offer a cheap DIY moss pole solution without compromising functionality.
Best DIY Moss Pole Tips
Keep moss moist but not soggy: Regular misting or occasional soaking ensures the moss retains enough moisture without becoming waterlogged, which can cause rot.
Trim dead leaves regularly: Regular pruning encourages new growth and prevents overcrowding or fungal buildup on the moss pole.
Attach aerial roots gently with clips: Gently tying or clipping vines and roots helps the plant adjust to its support without damage. Avoid forceful bending.
Re-soak moss every 2–4 weeks: Depending on humidity levels, periodically rehydrating the moss maintains its functionality and promotes root health.
DIY Moss Pole Supplies Checklist
| Items | Description |
| Moss | Use sphagnum or coco coir for moisture retention |
| Core | Choose between PVC, wood, or plastic rods |
| Wrap | Chicken wire, mesh, or garden netting for structure |
| Fasteners | Zip ties, twine, or cloth strips to secure moss |
| Optional | Include plastic backing, humidifier, or watering tube |
Common Mistakes to Avoid
- Using dry moss: Dry moss doesn’t retain water or support roots effectively. Always soak it first.
- Choosing weak core: A flimsy stake may bend or collapse under the plant’s weight. Use sturdy materials that can withstand long-term use.
- Skipping plastic backing: If you’re placing the plant on furniture or a floor, moisture can cause damage. Plastic backing helps protect these surfaces.
- Not soaking moss: Dry moss is less flexible and hard to wrap. It also won’t provide the humidity that plants need for aerial root development.
Long-Term Maintenance of Moss Poles
To keep your moss pole functional, replace the moss every 6 to 12 months, especially if it becomes compacted or moldy. As your plant grows, you may need to extend or upgrade the pole. Clean any plastic or wood components occasionally to prevent buildup and mold. Always check the moss’s moisture level and rehydrate as needed.
Alternatives to Moss Poles
- Coco coir poles: Made from coconut fiber, these are a sturdy, pre-made alternative that also retains moisture well.
- Trellises: Ideal for lighter vines, trellises can be wall-mounted or placed in pots for decorative plant displays.
- Wall-mounted grids: These metal or plastic frameworks are great for training vines to grow across vertical surfaces without taking up pot space.
Conclusion
Creating a DIY moss pole is one of the most rewarding tasks for plant and garden lovers. Whether you’re making a DIY bendable moss pole, a cheap moss pole, or a self-watering moss pole, the customization options are endless. With materials easily available from Bunnings, Home Depot, or around the home, you can tailor a moss pole to fit your specific plant needs, aesthetic, and budget.
FAQs
What is the best moss for a DIY moss pole?
Sphagnum moss is the best due to its moisture retention and root-friendly texture.
Can I make a self-watering moss pole at home?
Yes, by inserting a water reservoir tube or using a wicking system from a water-filled base.
Are moss poles reusable?
Yes. You can remove and replace the moss while reusing the core structure.
Is a plastic moss pole safe for plants?
Yes, if made from non-toxic plastic and covered with moss or mesh.
How long does a moss pole last?
With proper care, it can last up to 2 years.
Do I need to mist the moss regularly?
Yes, misting every few days keeps it moist and effective for root support.