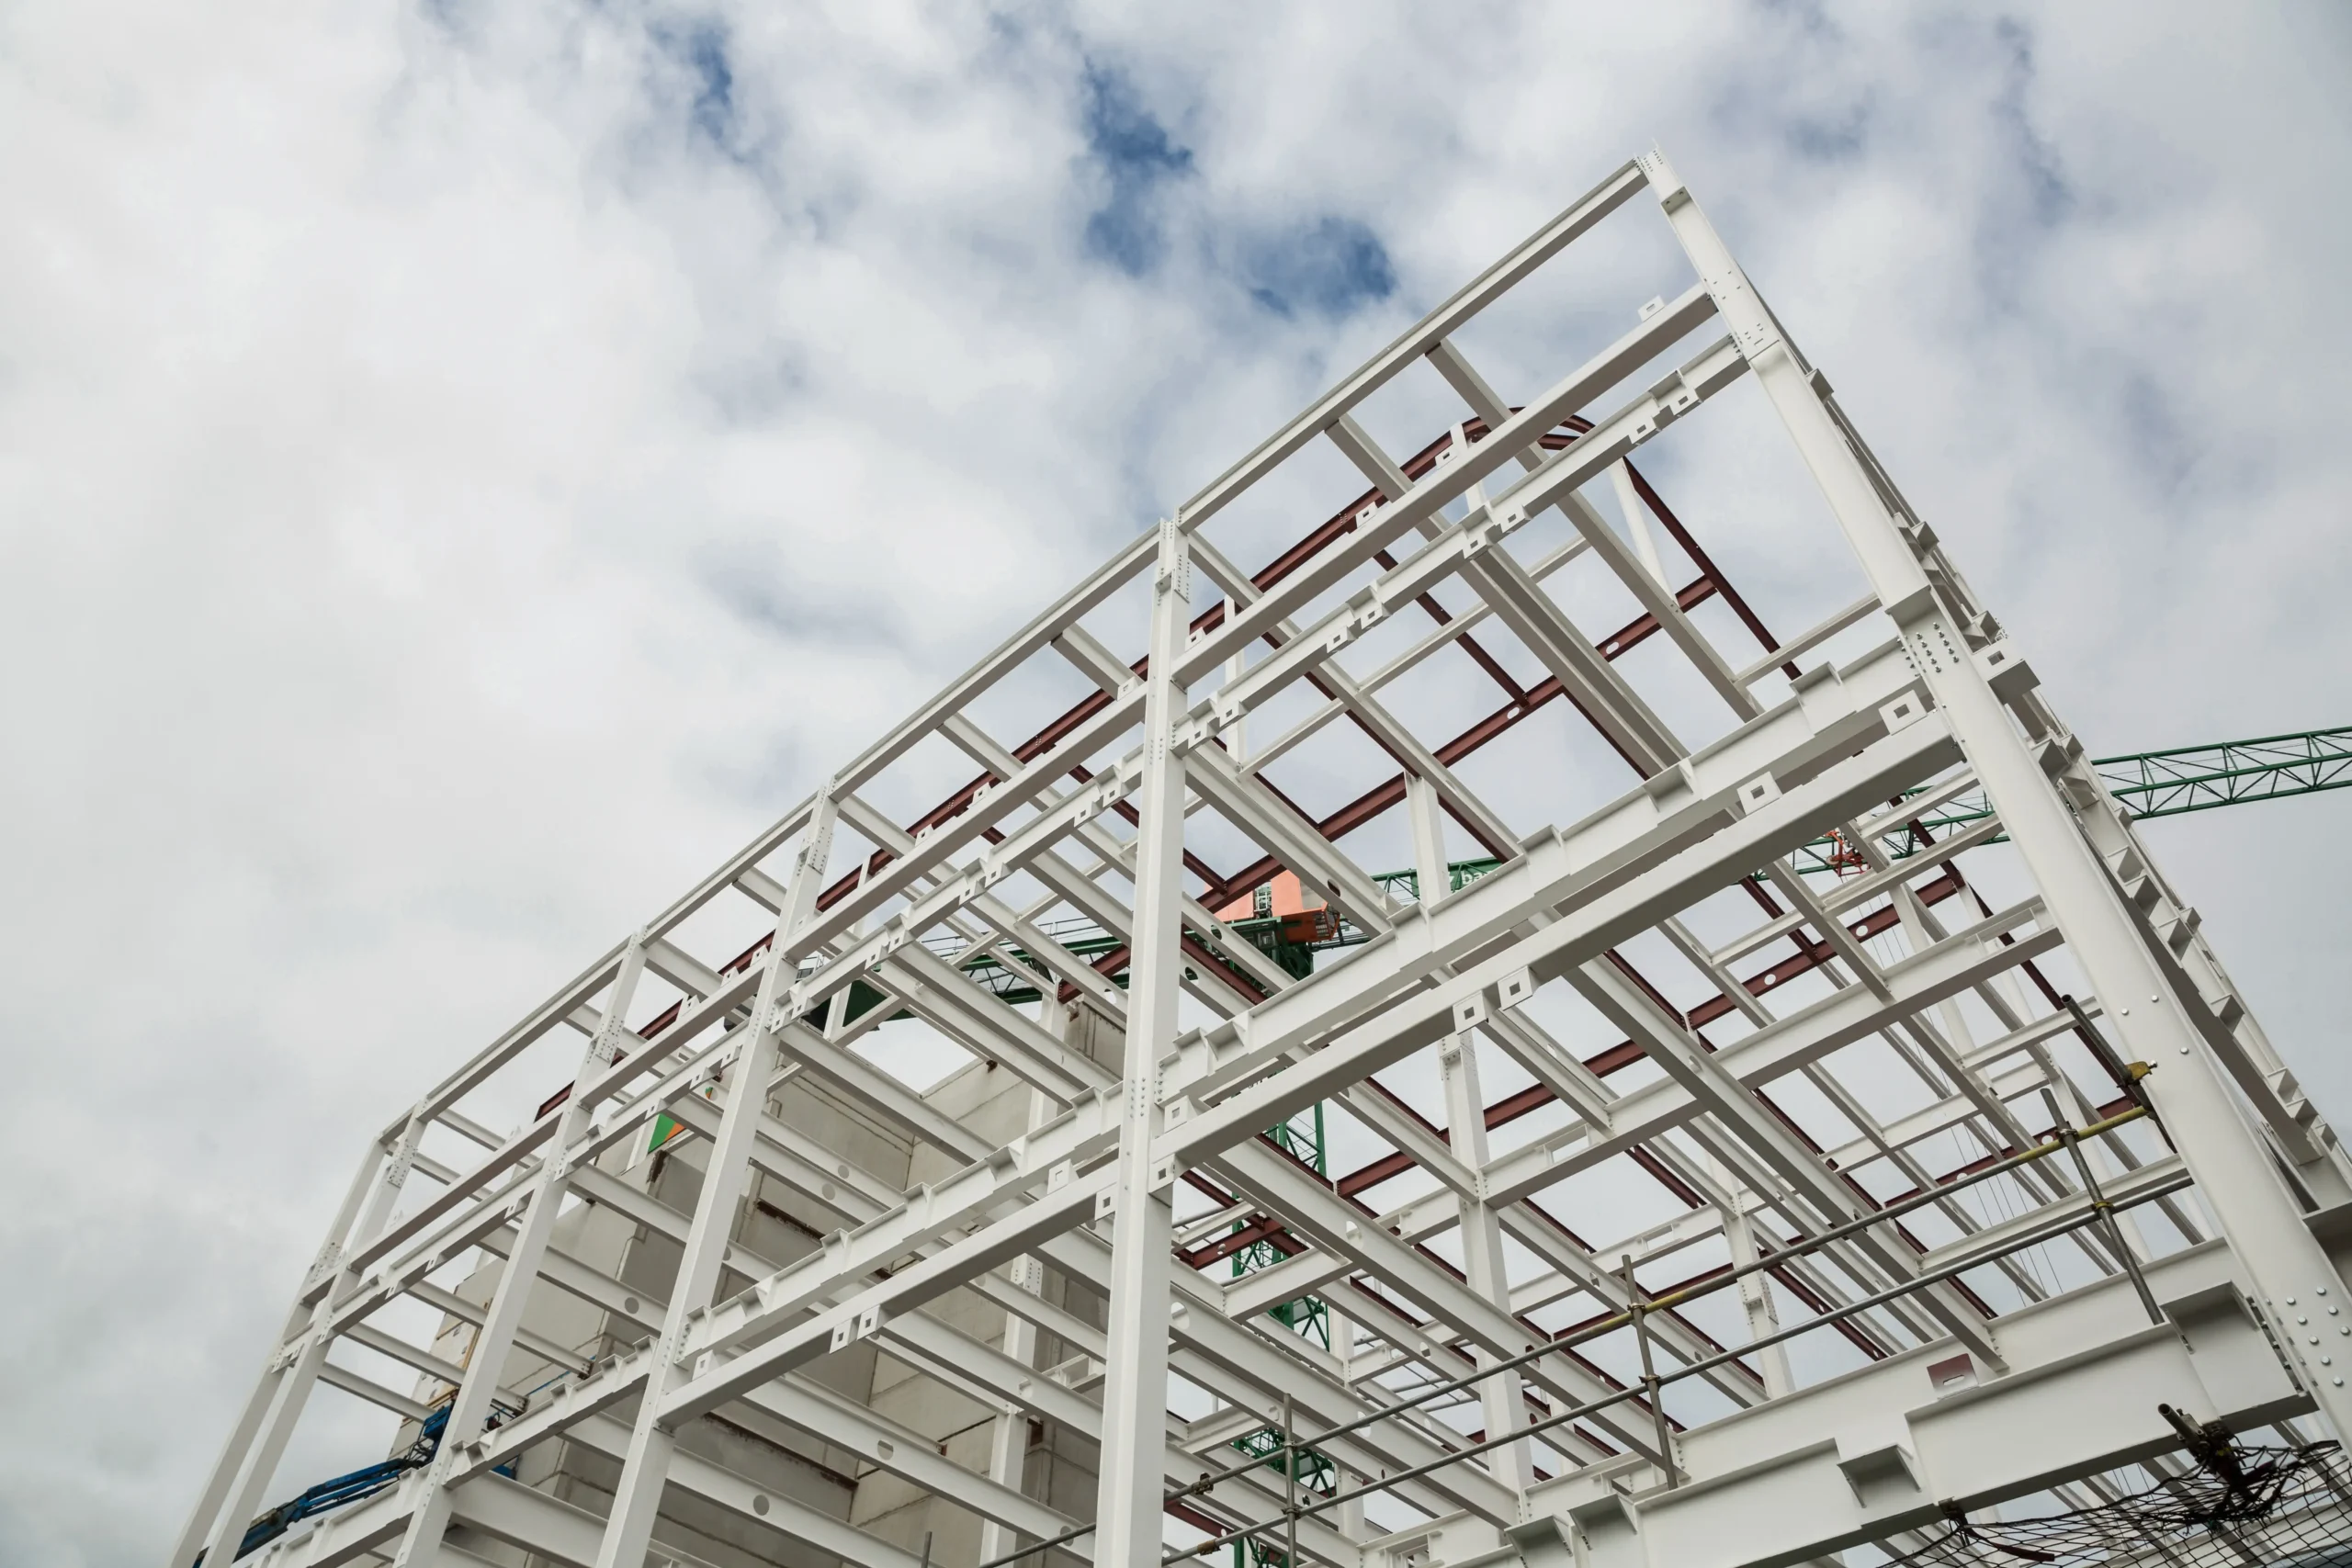
Steel purlins may not be the most visible part of a metal building, but they play a huge role in how strong and reliable the structure becomes. These long, horizontal supports hold roofing and wall panels in place while helping the building handle heavy loads, wind, and changing weather. When chosen and installed correctly, steel purlins improve stability, extend the life of the building, and reduce long-term maintenance.
Whether you’re planning a warehouse, factory, or agricultural shed, understanding how steel purlins work can help you make smarter construction choices and avoid costly issues later. This guide breaks down why steel purlins truly matter.
How Steel Purlins Function as Critical Load-Transfer Members
Think of purlins as more than panel holders—they’re actually the connection point between your roof surface and the mainframe underneath. Cut them out or undersize them, and you’ll see a structural efficiency tank.
How they work in roof and wall assemblies
Steel purlins function as secondary framing that reaches across your primary rafters or moment frames, building a grid where panels can lock in place. Wall girts do the same job vertically, steadying columns while pushing back against wind trying to blow your walls in. Together, they add rigidity to the whole building envelope and stop it from racking sideways when loads hit. The choice between roof purlins and wall girts isn’t random—engineers size each one for different force directions and fastening needs.
What kinds of loads hit purlins in real-world conditions
Panel weight and insulation represent your baseline dead load. But purlins also catch live loads—think workers doing inspections, snow that piles up in odd patterns, uplift from wind trying to rip the roof clean off, and equipment loads like rooftop units or solar racks. ASCE 7 standards spell out how these forces stack up, and your exposure category can double or triple design pressures if you’re building in open fields or along the coast.
Where purlins fail and how smart design stops it
Oil-canning, tired fasteners, and ponding cause most field complaints. Buckling—whether it’s the flange folding or the whole member twisting—crops up when you span too far or skip the bracing. Connections tear out and rust accelerates at laps when fastener layouts don’t follow the load path. Stop these problems by sticking to bridging schedules, hitting your lap lengths with enough bolts, and picking coatings that match the local weather. You’ll sometimes see references online to steel perlins, which is just another way of naming the same horizontal supports throughout metal building construction systems.
Knowing what purlins face is only part of the story—picking the *correct* shape and material mix guarantees those forces stay under control for years. Let’s unpack the profiles, steel grades, and finishes that separate long-haul winners from early failures.
Choosing Purlin Profiles and Materials That Last
Your profile pick and material callouts aren’t just items to check off. They control how well the roof resists sagging, handles expansion and contraction, and stands up to rough conditions decade after decade.
When to use Z purlins versus C purlins
Z shapes let you overlap members at supports, creating continuous runs that boost capacity and cut deflection compared to simple-span setups. They’re your first choice for long roof bays where saving material matters. C shapes make end details simpler and shine at eaves, rakes, or anywhere laps don’t work because of tight geometry.
Your call should depend on how far you’re spanning, bay dimensions, and whether your install sequence gains anything from lapped continuity.
Steel strength, gauge, and coating choices that extend lifespan
Most purlins use 50-ksi steel in gauges running from 12 down to 20, but thickness drives stiffness just as much as yield strength. G90 galvanizing handles rust in typical climates, while Galvalume beats it hands-down near oceans. If you’re building ag facilities with ammonia fumes or damp interiors, look at painted systems with sealed cut edges to block white rust and push service life past standard warranties.
With profile and material locked in, the advantages of steel purlins turn concrete: jobs finish faster, costs drop, and site issues disappear. Here’s how properly specified purlins pay off across the whole project.
Real Advantages Steel Purlins Bring to Your Build
When you line up steel building components head-to-head, purlins beat other options on several key metrics. These aren’t fluffy benefits—they’re numbers you can measure in crew hours, equipment rental, and service call logs.
High strength without the weight penalty
Cold-formed purlins carry big loads without the heft of hot-rolled shapes. That translates to easier handling, quicker crane moves, and lighter dead weight trickling down to your footings. Less mass means smaller foundations, and foundation savings can put a real dent in your budget.
Quicker installation and hassle-free fitting
Factory-punched holes, standard spacing, and easy bridging alignment make erection smoother. Crews skip the time sink of field-drilling or fixing misalignments, and even green hands get up to speed fast. Consistent factory tolerances mean everything clicks together like it should, cutting rework and keeping you on schedule.
Decades of solid performance with minimal callbacks
Good purlin detailing eliminates the gripes that trigger warranty claims and hurt your reputation. Cold-formed members from installations dating back over 80 years are still performing, showing that well-engineered purlins can outlive optimistic projections. That history means fewer leaks from pulled fasteners, less sagging from excess deflection, and lower upkeep costs year over year.
Capturing these wins hinges entirely on early engineering and detailing. Let’s walk through the design calls—span, spacing, bracing, laps, and attachment points—that turn paper advantages into field reality.
Field-Tested Design Guidelines for Steel Purlins
Design errors cascade into site problems and change orders fast. A handful of upfront decisions lock in performance and dodge the usual purlin pitfalls.
Span and spacing choices that keep deflection and bounce in check
Purlin spacing usually lands between 4 and 6 feet on center, shaped by panel maker specs and deflection caps. Longer reaches demand deeper sections or tighter spacing to hit deflection targets and avoid that springy feel when someone walks the roof. Your bay layout should anticipate future equipment and expansion, not just meet today’s bare minimums.
Bracing that blocks twisting and lateral collapse
Angle braces, sag rods, or continuous bracing lines keep purlins from rotating under uplift or uneven loads. Typical placement hits mid-span on shorter members or third-points when you exceed 25 feet. Skip it, and you’re rolling the dice with lateral-torsional buckling that can drop sections without much warning.
Even brilliantly engineered purlins fall short if installation corners get cut. Use this proven checklist to safeguard your work from truck delivery through final panel fastening.
FAQs
Do you actually need purlins for a metal roof?
Absolutely. Purlins deliver crucial support between your primary frames and roof panels. Skip them, and you’ll need solid decking underneath—which piles on time, weight, and material expense versus purlin-supported designs.
What’s the downside of using steel purlins?
Steel purlins have reached limits—bigger spans demand extra bracing like knee braces or apex struts to keep things rigid. Complexity also climbs in larger projects where you need multiple bridging runs and beefed-up connections.
Can I hang equipment straight from purlins?
You can, but only with engineer sign-off and usually some reinforcement plates or special clips. Suspending HVAC gear, sprinklers, or solar panels without accounting for point loads risks local buckling or torn connections down the road.
With these answers in your toolkit, you’re ready to specify, install, and maintain steel purlins that deliver decades of trouble-free, low-maintenance results. Here’s your next move toward a smarter, tougher metal building.
Build Better with the Right Steel Purlins
The benefits of steel purlins in durable metal buildings go way past load charts and gauge numbers. They surface in tighter schedules, trimmed lifecycle expenses, and roofs that don’t dial you up years later. Whether you’re framing a distribution center, big-box store, or farm building, nailing purlin selection and detailing protects both your reputation and your client’s money. Don’t push them to the end of your checklist—bring your engineer in early, double-check bridging and lap callouts, and match coatings to local conditions. The reward is a building that runs smoothly for generations.