Learning how to grow bush beans is one of the quickest paths to a bountiful vegetable garden. Bush snap beans (Phaseolus vulgaris) are compact, productive, and forgiving plants that produce crisp, tender pods in as few as 50 to 60 days from planting. Because they do not require tall poles, elaborate netting, or sturdy trellises, they fit cleanly into small garden beds, raised planters, and patio containers.
Even though beans are generally beginner-friendly, timing and soil conditions make all the difference. Planting too early in cold, wet spring soil can cause seeds to decay before they sprout, and applying the wrong fertilizer can give you leafy green bushes with virtually no pods.
This guide breaks down every stage of how to grow bush beans, from seed selection and spacing to staggered plantings and harvesting your crop.
Bush Beans vs. Pole Beans: Key Differences
Understanding the growth habits of bush and pole beans helps you plan your garden layout and harvest schedule effectively.
| Feature | Bush Beans | Pole Beans |
| Plant Structure | Compact, freestanding mounds (12–24 inches / 30–60 cm tall) | Climbing vines (6–10 feet / 1.8–3 meters tall) |
| Support Needed | None; stems support themselves | Mandatory trellis, tepee, stakes, or netting |
| Days to Maturity | Fast (50–60 days) | Slower (65–85 days) |
| Harvest Window | Concentrated flush over 2 to 3 weeks | Continuous small harvests throughout summer |
| Best Use | Canning, freezing, small gardens, containers | Extended fresh eating, vertical garden spaces |
Because bush beans deliver the bulk of their harvest within a concentrated two-to-three-week window, learning how to grow bush beans often involves planting small batches every couple of weeks to enjoy fresh harvests throughout the entire summer.
Soil and Temperature Requirements
Bush beans are warm-season tender annuals. They cannot tolerate frost, and their large seeds are prone to rotting in cold, waterlogged soil.
Soil Temperature and Germination
Soil temperature is the most critical factor when starting out. While bean seeds may technically germinate at 55°F (13°C), emergence is slow and irregular, leaving seeds vulnerable to damping-off fungi and maggots.
- Minimum Planting Temperature: Wait until the soil consistently registers at least 65°F (18°C) at a depth of 2 inches.
- Optimal Temperature: Soil temperatures between 70°F and 80°F (21°C and 27°C) produce rapid germination, with sprouts emerging in 6 to 8 days.
- Air Temperature: Bush beans perform best when ambient daytime temperatures hover between 70°F and 85°F (21°C and 29°C). Extended periods above 90°F (32°C) can cause blossoms to drop before pods form.
Soil pH and Texture
Bush beans prefer loose, well-aerated, loamy soil with steady drainage.
- Drainage: Dense, compacted clay soils restrict root oxygen and can cause seed rot during early spring rains. Mix in aged compost to loosen heavy soils.
- Soil pH: Target a slightly acidic to neutral pH between 6.0 and 6.8. Highly acidic soils (below 5.8) can hinder nutrient absorption and disrupt beneficial root microbes.
Step 1: Choosing the Right Bush Bean Varieties
When planning how to grow bush beans, pick cultivars suited to your cooking preferences and growing season:
- Green Podded (Classic Snap Beans):
- Provider: Exceptionally reliable, tolerates cooler soil better than most varieties, and produces high early yields.
- Blue Lake 274: Renowned for tender, stringless, straight green pods with classic, rich green bean flavor.
- Contender: Tolerates heat and produces heavy yields early in the season.
- Yellow Wax Beans:
- Cherokee Wax: Distinctive buttery yellow pods that are tender, stringless, and easy to spot among green foliage.
- Purple Podded:
- Royal Burgundy: Deep violet pods that contrast with green leaves for effortless harvesting. Pods turn bright emerald green when steamed or boiled.
- French Filet Types (Haricots Verts):
- Maxibel: Slender, extra-fine gourmet pods with delicate texture and sweet flavor. Must be picked frequently when young.
Step 2: Planting Bush Beans (Depth, Spacing, and Inoculants)
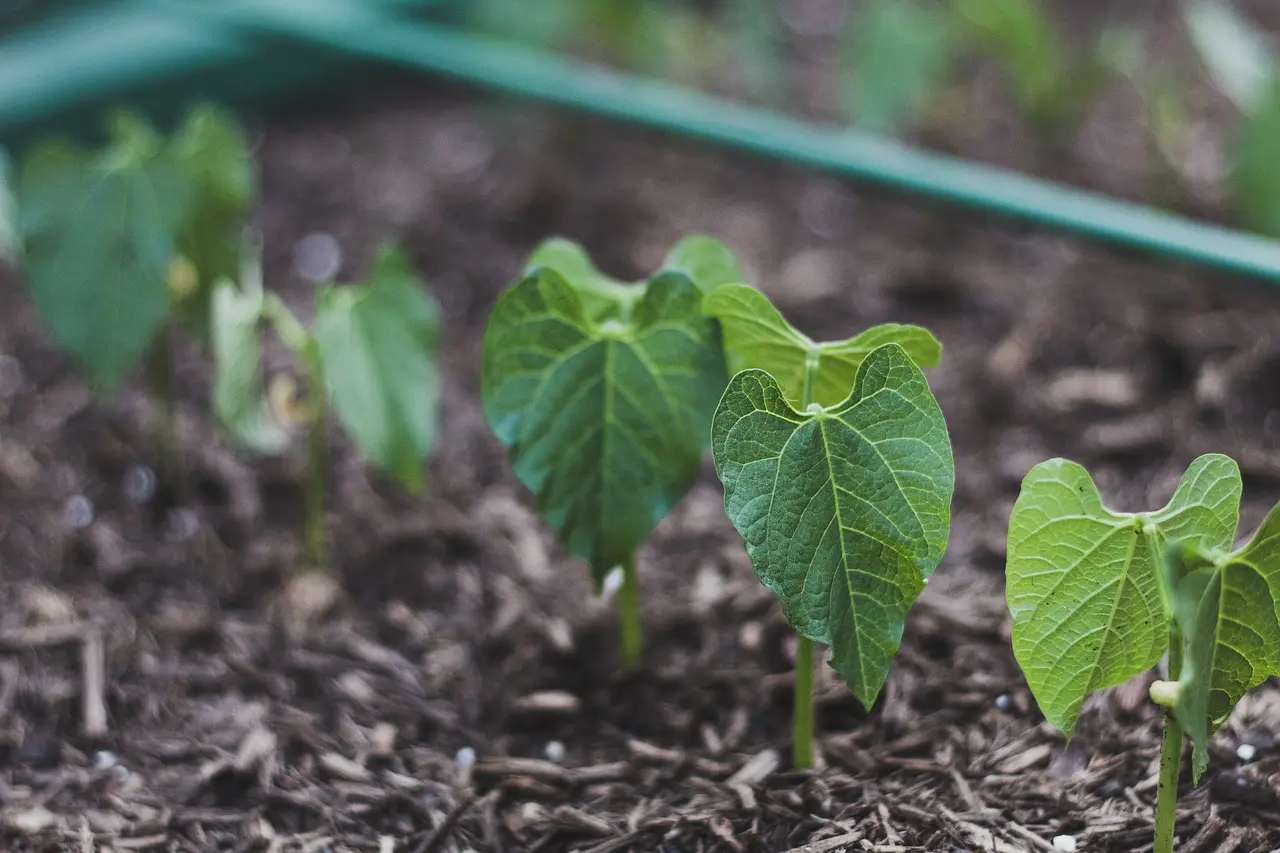
Always direct-sow bush beans straight into the garden. Bush bean seedlings have sensitive, shallow taproots that do not handle transplanting well.
Direct Sowing Instructions
- Prepare the Bed: Rake the soil smooth and remove rocks, weeds, and large clumps. Ensure the soil is moderately moist before planting.
- Planting Depth: Plant seeds 1 inch (2.5 cm) deep in standard soil. In light, sandy soil that dries quickly, plant up to 1.5 inches (3.8 cm) deep.
- In-Row Spacing: Space seeds 2 to 4 inches (5 to 10 cm) apart within the row.
- Row Spacing: Space individual rows 18 to 24 inches (45 to 60 cm) apart. This distance leaves room for air circulation, reduces the risk of fungal leaf diseases, and gives you space to walk while harvesting.
- Thinning: Once seedlings emerge with their first true leaves, thin the row so remaining plants stand 4 to 6 inches (10 to 15 cm) apart. Always snip excess seedlings at soil level with shears rather than pulling them up to protect the neighboring roots.
Using Legume Inoculants for Better Yields
Like other legumes, bush beans form a symbiotic relationship with beneficial soil bacteria called Rhizobium leguminosarum. These bacteria colonize root nodules, taking atmospheric nitrogen and converting it into plant-available nutrients.
If you are discovering how to grow bush beans in a bed where beans or peas have never grown, dust the seeds with a powdered legume inoculant just before planting. Dampen the seeds slightly with water, toss them in the inoculant powder until coated, and plant immediately out of direct sunlight. Inoculation promotes early vigor and increases pod yield.
Step 3: Succession Planting for a Continuous Harvest
One of the most practical tips for how to grow bush beans is to use succession planting. Because each bush bean plant produces the bulk of its harvest over two to three weeks, planting your entire seed packet at once will leave you with a sudden flood of beans followed by an empty garden.
- The Two-Week Cadence: Plant a short row or section of bush beans every 10 to 14 days from late spring until midsummer.
- Fall Harvest Calculation: To determine your final planting date for a late summer or fall crop, find your region’s average first fall frost date and count backward by 60 to 70 days. This gives the plants enough time to mature before freezing weather arrives.
Step 4: Watering and Moisture Management
Bush beans have relatively shallow root systems, making consistent moisture essential—especially during flowering and pod development.
- Critical Moisture Windows: The two most important periods for watering are when the plants begin to bloom and when the pods are swelling. Water stress during bloom time causes flowers to drop, directly reducing your harvest.
- Watering Depth: Aim for 1 inch (2.5 cm) of water per week, whether from rainfall or deep irrigation. In hot, dry weather, check soil moisture frequently; the top 2 to 3 inches should feel evenly damp, like a lightly wrung-out sponge.
- Keep Leaves Dry: Always apply water directly to the base of the plant using drip irrigation, a soaker hose, or a gentle watering can. Avoid overhead sprinklers. Wet leaves create an ideal environment for bean rust, anthracnose, and bacterial blight.
- Mulching: Once seedlings reach 4 to 6 inches tall, spread a 2-inch layer of clean straw, untreated grass clippings, or shredded leaves around the plants. Mulch keeps the shallow root zone cool, suppresses competing weeds, and prevents soil moisture from evaporating rapidly.
Step 5: Fertilizer Rules (Why Bush Beans Need Little Nitrogen)
A common mistake gardeners make when learning how to grow bush beans is over-fertilizing with standard high-nitrogen plant foods.
- The Nitrogen Danger: Because beans fix their own nitrogen through root nodules, excess nitrogen fertilizer causes excessive vegetative growth. You will end up with huge, lush green leaves, delayed flowering, and sparse pod production.
- Best Soil Amendments: If your soil was amended with organic compost before planting, bush beans rarely need additional fertilizer.
- Supplemental Nutrients: If a soil test indicates low fertility, apply a low-nitrogen, higher-phosphorus and potassium organic blend (such as a 3-5-5 or 5-10-10 ratio) worked into the soil before sowing. Phosphorus supports root growth and blossom set, while potassium encourages sturdy stems and pod filling.
Step 6: How to Grow Bush Beans in Containers and Raised Beds
If you have limited space, growing bush beans in containers or raised beds is straightforward and highly productive.
- Container Size: Use pots or troughs with a minimum depth of 8 to 10 inches (20 to 25 cm). A standard 5-gallon container easily accommodates 2 to 3 bush bean plants.
- Drainage: Verify that your pots have ample drainage holes. Waterlogged potting mix causes root rot.
- Potting Mix: Use a loose, lightweight container potting soil blended with 20% perlite and well-aged compost. Never use garden dirt in containers.
- Square Foot Gardening: In raised beds, space bush beans in a grid pattern. You can plant 9 bush bean plants per square foot (spaced roughly 4 inches apart in each direction) to maximize production in small areas.
Step 7: Harvesting Bush Beans for Peak Flavor and Yield
Harvesting at the right time ensures pods stay tender, sweet, and stringless.
- When to Pick: Harvest pods when they are firm, crisp, and pencil-thick, before the seeds bulge noticeably inside the skin. Once seeds become large and pronounced, the pods turn tough, woody, and fibrous.
- How to Pick: Never rip or yank pods from the plant. Bush bean stems are brittle, and their shallow root systems can easily be pulled straight out of the ground. Hold the stem with one hand and gently snap or snip the bean stem with the other.
- Harvest Frequently: Check your plants every 2 to 3 days once production begins. Picking mature beans promptly signals the plant to keep setting new flowers and filling pods.
- Storage: Store freshly picked, unwashed beans in a breathable container or perforated plastic bag in the refrigerator crisper drawer. For the best snap and sweetness, use them within 5 to 7 days.
Troubleshooting Common Problems with Bush Beans
| Problem / Symptom | Root Cause | Solution |
| Seeds rot or fail to sprout | Soil too cold (under 60°F / 15°C) or waterlogged | Wait until soil warms to at least 65°F before planting. Improve drainage with compost. |
| Abundant green foliage, but zero flowers or pods | Excess nitrogen in the soil | Stop applying high-nitrogen fertilizers. Flush soil with water and add a bone meal or phosphorus amendment. |
| Blossoms drop off without setting pods | High heat (above 90°F / 32°C) or drought stress | Keep soil evenly moist. Provide temporary afternoon shade cloths during intense summer heatwaves. |
| Lacy holes eaten through leaves and pods | Mexican bean beetles or caterpillars | Handpick adult beetles and orange egg clusters from leaf undersides. Use floating row covers early in the season. |
| Brown spots or rust-colored powder on leaves | Bean rust or fungal leaf blight | Water only at the soil level. Never handle bean foliage when it is wet from dew or rain. Ensure proper row spacing. |
| Seedlings cut off cleanly at soil level | Cutworms | Place a 2-inch cardboard collar around young seedling stems pushed 1 inch into the soil. |
Frequently Asked Questions
Do bush beans need cages, stakes, or trellises to grow?
No. Unlike vining pole beans, bush beans have strong, self-supporting stems that naturally hold the plant upright at 12 to 24 inches tall. Occasionally, heavy pod sets combined with strong rainstorms can cause plants to lean slightly; if this happens, gently mound an inch of soil around the base of the stems for added stability.
How many bush bean plants should I grow per person?
A good rule of thumb is to plant 10 to 15 bush bean plants per person for fresh summer eating. If you plan to preserve beans by canning, pickling, or freezing for year-round use, increase that to 25 to 30 plants per person, staggered across two or three plantings.
Can I save seeds from my bush bean crop for next season?
Yes, as long as you are growing an open-pollinated or heirloom variety (such as Provider or Blue Lake 274) rather than a hybrid (F1) variety. Let several pods mature completely on the plant until they turn brown, dry, and brittle. Shell the seeds, dry them indoors on paper towels for two weeks, and store them in an airtight container in a cool, dark spot.
How long does it take for bush beans to produce pods?
Most bush bean varieties mature rapidly, taking 50 to 60 days from seed to first harvest. Once picking starts, each plant will continue producing fresh pods for about two to three weeks before production slows down.