If you’re wondering how to insulate attic on a budget, I’d start by sealing air leaks and adding affordable fiberglass or blown-in cellulose insulation to the attic floor. These improvements can reduce heat transfer and make your home more comfortable without paying for an expensive roof renovation. The trick is choosing the right materials and doing the preparation properly.
I’ve found that the cheapest approach isn’t always the one with the lowest price tag. Poorly installed insulation can leave gaps, trap moisture, or fail to deliver the savings you expected. Here’s how I’d plan an affordable attic insulation project without cutting corners.
How to Insulate Attic on a Budget Without Wasting Money
Before buying insulation, figure out where your home loses conditioned air and whether the existing insulation is sufficient. I recommend starting with small improvements that address obvious problems, then spending money on additional insulation where it’s actually needed.
Start With Air Sealing Before Buying Insulation
Air leaks allow heated or cooled indoor air to escape through openings in the ceiling. Even thick insulation won’t completely stop this movement because insulation and air sealing serve different purposes.
I’d focus on these areas first:
- Plumbing penetrations: Seal suitable gaps around pipes with compatible caulk or expanding foam.
- Electrical penetrations: Seal accessible gaps around approved electrical-box assemblies without interfering with wiring.
- Ceiling openings: Check dropped soffits and openings above interior walls.
- Attic access: Add weatherstripping around the hatch or door.
Use materials rated for each location, and leave electrical hazards and high-temperature areas to qualified professionals. The ENERGY STAR attic air-sealing guide is a useful reference.
Insulate the Attic Floor Instead of the Roof When Appropriate
For a typical unfinished, vented attic, I’d insulate the floor rather than the underside of the roof. This keeps the insulation at the boundary between your living space and the unconditioned attic.
Roof-deck insulation can make sense when the attic is conditioned or part of the living area. However, finished attics require careful attention to ventilation, moisture control, and roof assembly design, so I wouldn’t treat them as a simple DIY floor-insulation project.
Make Improvements in Stages When Money Is Tight
You don’t have to purchase everything at once. I’d organize the project into affordable stages while keeping the attic safe and functional.
- Inspect the attic for leaks, pests, moisture, and existing insulation.
- Complete safe air-sealing improvements.
- Protect ventilation openings and fixtures.
- Purchase enough insulation to cover the planned area evenly.
- Finish remaining sections when your budget permits.
Avoid scattering insulation randomly across the attic. If you must work in stages, complete each accessible section properly instead of leaving thin patches everywhere.
What Is the Cheapest Attic Insulation That Actually Works?
Fiberglass rolls and blown-in cellulose are usually my first choices for affordable attic insulation. Both can provide good thermal performance, although the best option depends on attic access, floor layout, and the equipment available.
Blown-In Cellulose for Broad, Affordable Coverage
Cellulose insulation is usually made from recycled paper treated for fire resistance. It’s blown through a hose, allowing the loose fibers to fill irregular spaces around framing and obstacles.
I like cellulose for large, unfinished attics because it can create relatively consistent coverage. However, installation requires a blower, the material must be applied at the manufacturer’s specified density and thickness, and moisture problems must be corrected beforehand.
Fiberglass Batts, Rolls, and Loose-Fill Insulation
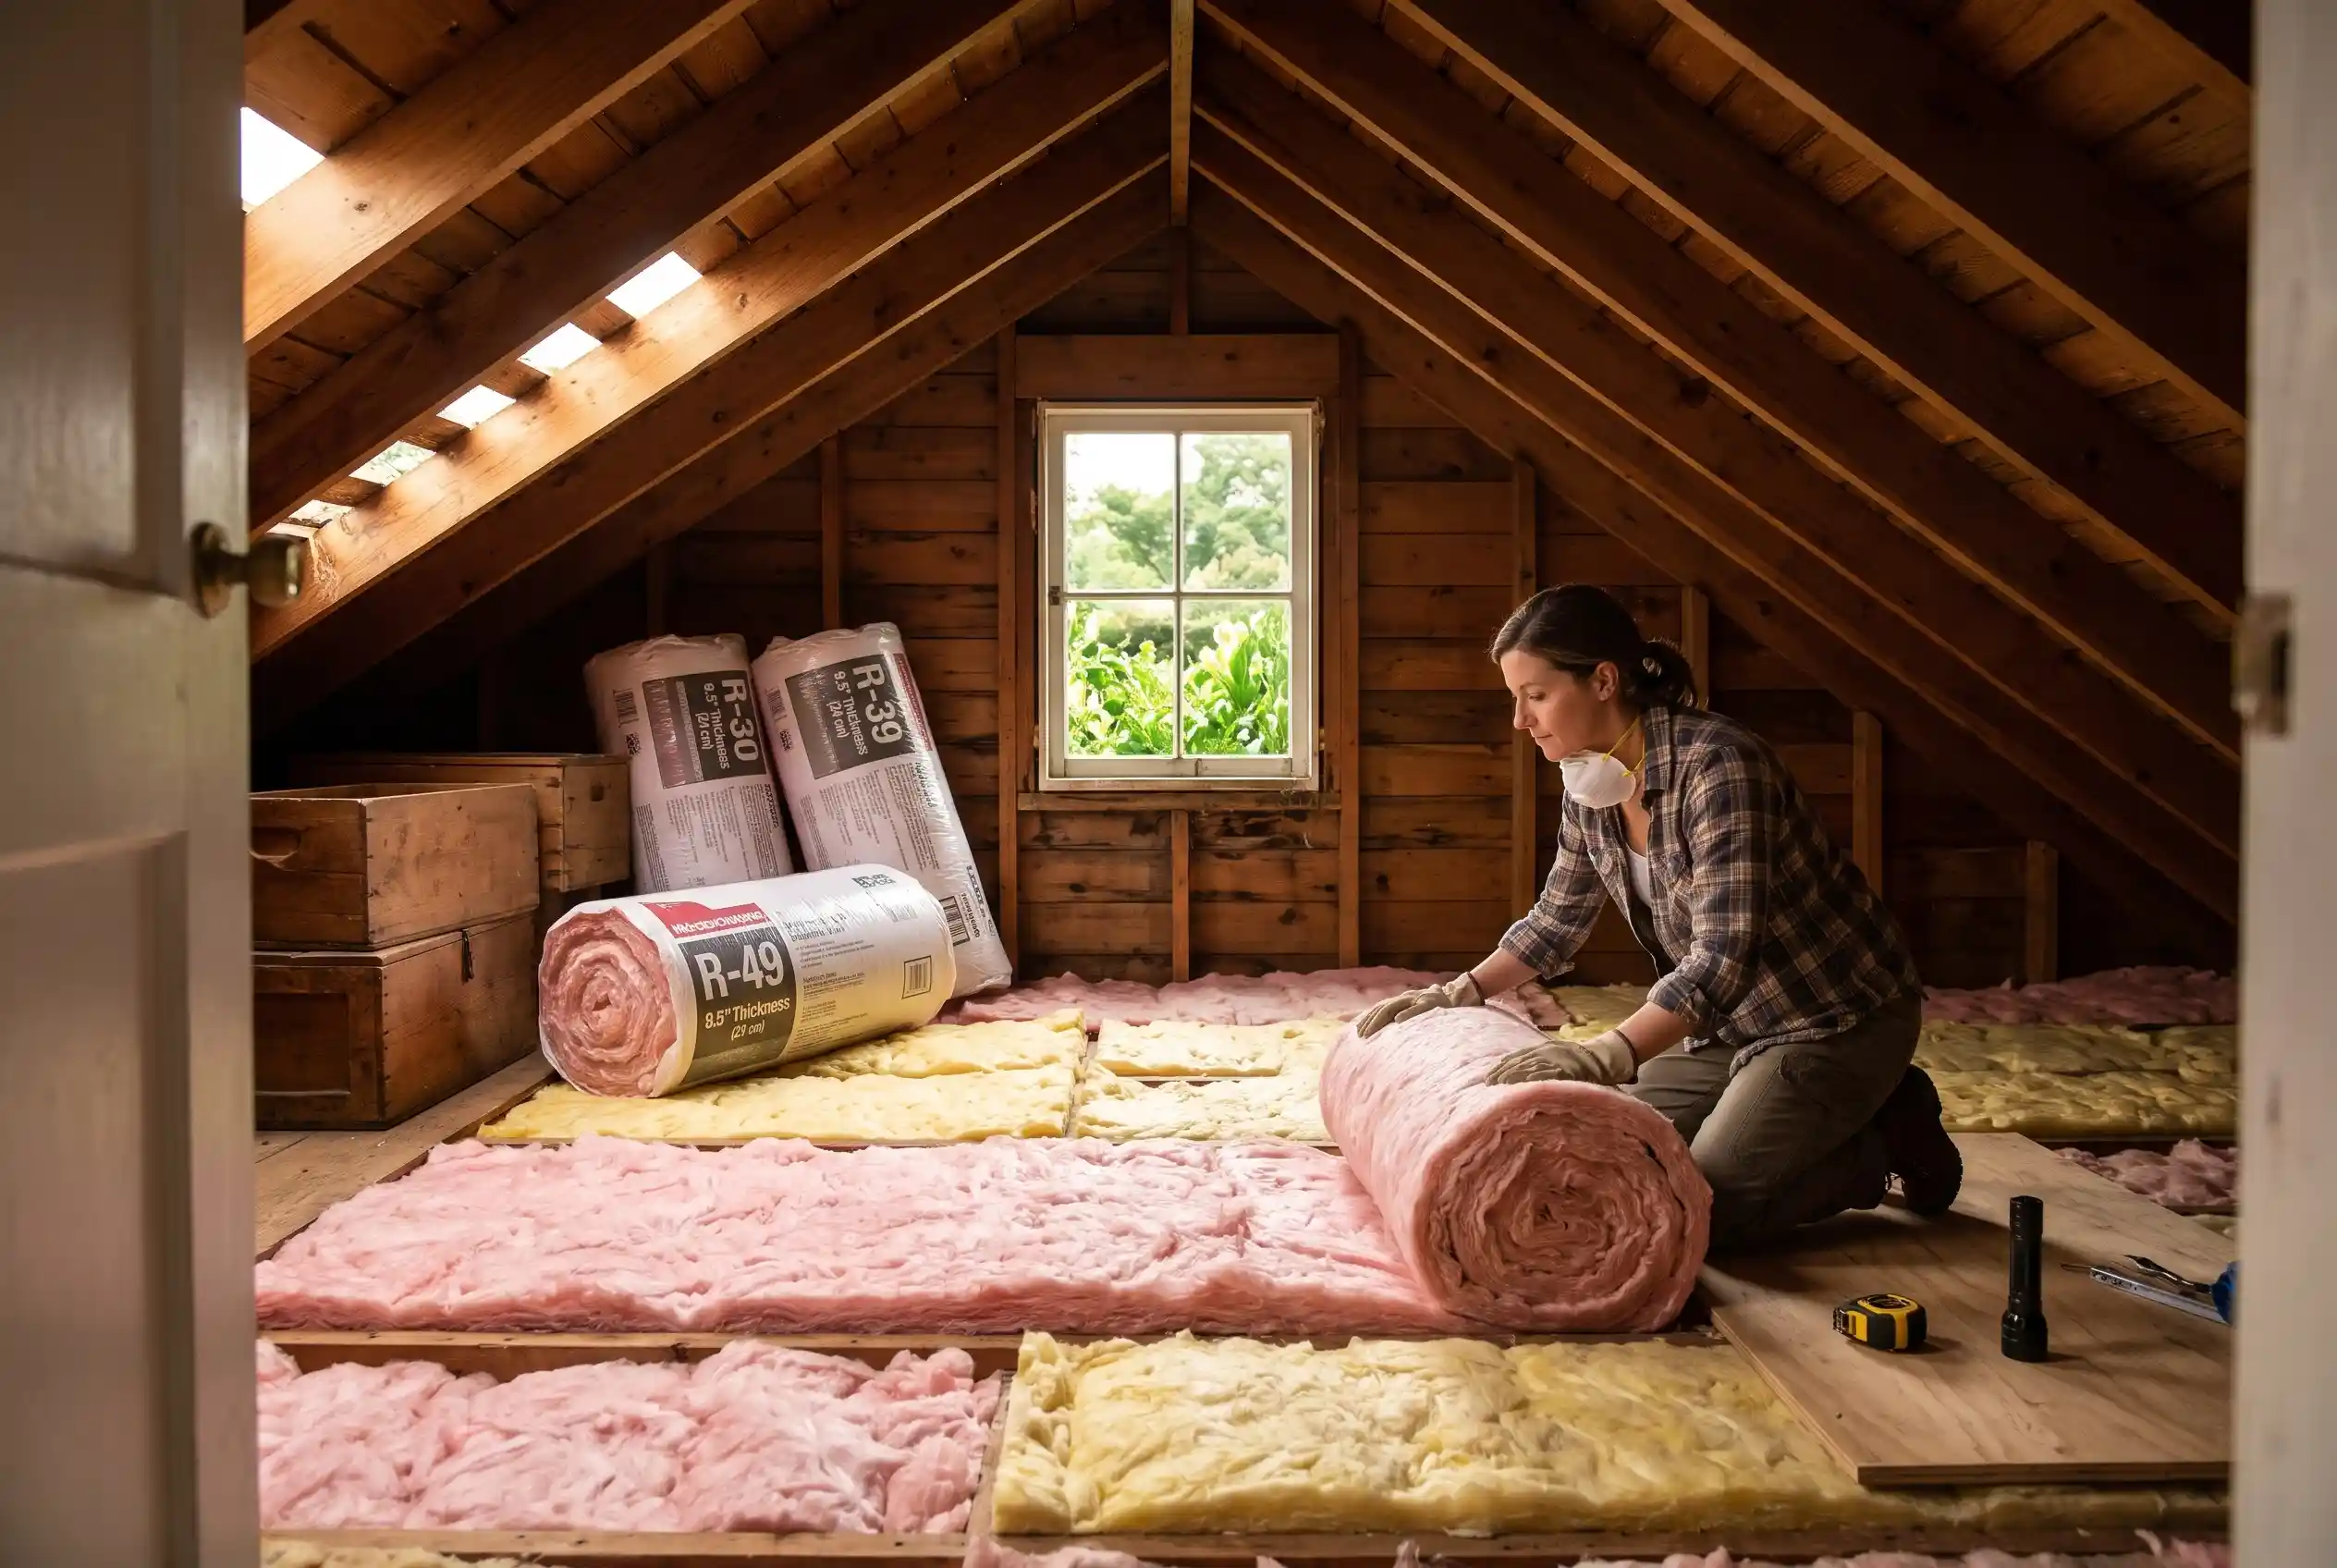
Fiberglass batts and rolls are convenient when attic joists are accessible and evenly spaced. You can cut them with a utility knife and install them without renting a blowing machine.
Loose-fill fiberglass offers another option for irregular spaces. I wouldn’t compress fiberglass batts to squeeze them beneath wiring or pipes because compression changes their thermal performance, and poorly fitted edges create unwanted gaps.
Are Foam Boards, Spray Foam, and Radiant Barriers Worth It?
Rigid foam boards work well for specific applications, including attic hatches and selected knee-wall assemblies. Spray foam can provide air sealing and insulation together, but a full professional roofline installation is generally more expensive.
Radiant barriers can help reduce radiant heat gain in some hot-climate attics. They aren’t replacements for conventional insulation and need proper installation conditions to work.
| Insulation material | Relative cost | DIY suitability | Main consideration |
|---|---|---|---|
| Fiberglass batts | Low | High | Best for accessible, regular spaces |
| Blown-in cellulose | Low–moderate | Moderate | Good coverage; blower required |
| Blown-in fiberglass | Low–moderate | Moderate | Lightweight loose-fill option |
| Rigid foam board | Moderate | Moderate | Useful for selected details |
| Spray foam | High | Low for large jobs | Professional installation preferred |
| Radiant barrier | Varies | Moderate | Supplements insulation in suitable climates |
I’d skip homemade insulation made from shredded cardboard, loose newspaper, or old clothing. These materials aren’t tested insulation systems and may introduce fire, moisture, or pest problems.
How Much Attic Insulation Do You Need, and What Will It Cost?
The total cost depends on your attic’s size, existing insulation, target R-value, and installation method. Instead of relying on a universal cost per square foot, I’d calculate the required material first and compare actual supplier prices.
Check Your Existing Insulation and Calculate the Target R-Value
R-value measures resistance to heat flow. Higher values generally mean better insulation performance, but the appropriate target depends on your climate and applicable building requirements.
To assess an accessible attic safely, measure the insulation depth and identify the material. ENERGY STAR provides approximate values of R-3.2 per inch for fiberglass batts and R-3.7 per inch for cellulose loose fill, although actual products vary.
For example, 4 inches of cellulose would provide approximately R-15. If your applicable target were R-49, you’d need roughly R-34 more, using the added product’s rated coverage and thickness to plan the installation.
I’d check the ENERGY STAR recommended R-values before purchasing.
Estimate Materials, Rental Equipment, and Total Expenses
Start by multiplying attic length by width to calculate square footage. Then check the insulation packaging for coverage at your required R-value; one bag doesn’t cover the same area at every thickness.
Here’s an illustrative budget worksheet for an 800-square-foot attic, using assumed prices rather than live store quotes.
| Expense | Example allowance |
|---|---|
| Air-sealing supplies | $60 |
| Ventilation baffles and hatch supplies | $90 |
| Insulation materials | $600 |
| Blower rental | $100 |
| Protective equipment | $50 |
| Subtotal | $900 |
| 10% contingency | $90 |
| Planning total | $990 |
Your actual total may be considerably different. I’d obtain local material prices, verify the number of bags required, and compare contractor estimates before deciding that DIY is cheaper.
What Should You Check Before Installing New Insulation?
Attic preparation matters just as much as the material itself. I’d inspect the space before moving anything because hidden water damage, unsafe wiring, and blocked vents can turn a simple project into an expensive repair.
Inspect Old Insulation for Water Damage, Pests, and Asbestos
You can often add new insulation over existing material if it’s dry, clean, and in sound condition. There’s usually no reason to discard functional insulation just because it’s old.
However, stop and seek appropriate professional advice if you discover:
- Wet insulation or active roof leaks.
- Mold growth or persistent musty odors.
- Rodent nesting, droppings, or contaminated material.
- Loose, pebble-like insulation that may be vermiculite.
The EPA advises homeowners to assume vermiculite insulation may contain asbestos and leave it undisturbed. Don’t vacuum, move, or cover suspected material yourself.
Protect Electrical Fixtures and Heat-Producing Equipment
Before installing anything, identify recessed lights, electrical connections, chimneys, and appliance flues. Ordinary insulation must not contact heat-producing equipment unless that contact is specifically permitted.
Non-IC-rated recessed lighting generally requires at least 3 inches of insulation clearance, while IC-rated fixtures are designed for permitted insulation contact according to their listings. I wouldn’t attempt to build improvised barriers around unsafe fixtures or alter combustion-vent clearances.
Keep Attic Ventilation and Moisture Control Working
A vented attic needs properly functioning airflow paths. Blocking soffit vents with insulation can interfere with ventilation and increase the risk of moisture problems.
I’d check three things:
- Soffit openings: Install suitable baffles to preserve airflow.
- Bathroom exhausts: Confirm they discharge outdoors, not into the attic.
- Water and condensation: Repair moisture sources before covering affected areas.
Vapor-retarder requirements also depend on the climate and roof assembly. I wouldn’t add plastic sheeting or another vapor barrier without checking the applicable design guidance.
How to Install Attic Insulation Yourself Step by Step
Once the attic is safe, air leaks are sealed, and material quantities are calculated, installation becomes more manageable. The following approaches apply mainly to accessible, unfinished attic floors.
Gather Your Tools and Prepare the Attic
I’d collect the equipment before opening any insulation packages. Repeated trips through a cramped attic make the work harder than necessary.
My basic checklist includes:
- Safety glasses, gloves, protective clothing, and appropriate respiratory protection.
- Measuring tape, utility knife, straightedge, and lighting.
- Rafter baffles, insulation dams, and depth markers.
- Stable work boards supported on suitable framing.
- Insulation materials and a blower, if required.
Never step directly onto ceiling drywall. Also, avoid working in extreme attic heat and keep track of wiring, ducts, and exposed roofing nails.
Install Blown-In Cellulose or Fiberglass
Blown-in insulation is usually easiest with two people. One feeds material into the machine while the other directs the hose across the attic floor.
I’d begin at the farthest accessible point and work back toward the hatch, keeping the hose positioned according to the manufacturer’s directions. Fill around obstacles without burying restricted fixtures or blocking baffles.
Use depth markers and the bag’s coverage requirements together. Reaching the correct depth alone doesn’t guarantee proper density, particularly with cellulose.
Lay Fiberglass Batts or Rolls Without Leaving Gaps
Fiberglass rolls require patience rather than complicated equipment. I prefer measuring each space carefully and cutting material on a stable surface outside the cramped work area.
Fit batts neatly between joists without compression. When adding a second layer, unfaced fiberglass can be placed perpendicular to the first layer to help cover framing and reduce heat transfer through the joists.
Don’t leave exposed corners or squeeze insulation around obstacles. A consistent layer performs better than an uneven one with several thick patches.
Small Attic Insulation Upgrades That Save Money
You don’t always need a truckload of insulation to improve an attic. Some smaller openings and neglected areas can make a noticeable difference, especially when the existing floor insulation is already reasonable.
Weatherstrip and Insulate the Attic Hatch
An unsealed hatch can let conditioned air escape into the attic. I’d apply weatherstripping around its perimeter and attach appropriately rated rigid foam to the hatch where suitable.
For pull-down stairs, an insulated, gasketed attic stair cover may be more practical. Make sure the hatch still closes and operates correctly after installation.
Address Knee Walls, Skylight Shafts, and Attic Ducts
Finished attic spaces often have short knee walls or enclosed shafts with missing insulation. These areas may require an air barrier as well as insulation.
I’d inspect:
- Knee walls for exposed cavities and gaps behind insulation.
- Skylight shafts for missing or poorly fitted insulation.
- HVAC ducts for disconnected joints or damaged insulation.
- Open framing cavities that allow air to bypass insulation.
Use compatible, code-compliant materials for each assembly. Duct leakage and complicated knee-wall details may justify professional help.
Preserve Insulation When Creating Attic Storage
Placing plywood directly over thick insulation can compress it and reduce its effective R-value. Instead, a properly supported raised platform can maintain insulation depth beneath the storage area.
However, I’d check the framing’s load capacity first. If the platform costs more than the storage is worth, keeping the attic clear is often the smarter budget decision.
How Can You Lower Attic Insulation Costs Even Further?
Once you’ve chosen a suitable material, there are still opportunities to reduce the final expense. I’d compare complete project costs instead of focusing only on the cheapest insulation package.
Compare Bulk Materials, Blower Rentals, and Contractor Quotes
Some retailers offer reduced or waived blower rental charges when you purchase a qualifying quantity of insulation. Check the rental terms before buying.
Other ways I’d control expenses include:
- Comparing material coverage at the same R-value.
- Asking local suppliers about bulk discounts.
- Purchasing all necessary supplies in one planned order.
- Getting multiple itemized contractor estimates.
- Avoiding damaged, unidentified, or improperly stored insulation.
Include delivery charges and disposal expenses when comparing options. A cheaper bag isn’t a bargain if you need substantially more bags to reach the same performance.
Check Utility Rebates and Weatherization Assistance
Local utilities and state programs may offer incentives for approved insulation improvements. Eligibility, installation requirements, and available funding vary, so check before starting.
The U.S. Department of Energy’s Weatherization Assistance Program also helps eligible low-income households improve home energy efficiency. Both homeowners and renters may qualify, although renters generally need landlord approval.
One correction to older online advice: the federal Energy Efficient Home Improvement Credit under Section 25C is unavailable for property placed in service after December 31, 2025, according to the IRS.
Know When DIY Costs More Than Hiring a Professional
I’d hire a qualified professional when the attic has suspected asbestos, unsafe wiring, major moisture problems, difficult access, or an unusual roof assembly. Correcting those problems after insulation is installed can cost far more than dealing with them beforehand.
I also wouldn’t automatically buy an attic fan to solve a hot-attic problem. Poorly configured powered ventilation can draw cooled indoor air into the attic, increasing energy use.
For anyone learning how to insulate attic on a budget, my preferred approach is simple: fix air leaks, preserve safe existing insulation, choose a cost-effective material, and install it evenly to the appropriate R-value. Spending carefully on the right work is much better than having to pay twice.
Frequently Asked Questions
1. What is the cheapest way to insulate an attic yourself?
I generally recommend air sealing followed by fiberglass rolls or blown-in cellulose for an accessible, unfinished attic. The cheapest choice depends on material prices, required coverage, and whether you need to rent equipment.
2. Can I put new attic insulation over old insulation?
Yes, you can often add insulation over existing material if it’s clean, dry, and suitable to remain in place. Don’t disturb suspected asbestos-containing insulation, and use unfaced material for additional fiberglass layers as appropriate.
3. Is blown-in insulation cheaper than fiberglass rolls?
Blown-in cellulose can be economical for large or irregular attic floors, while fiberglass rolls may cost less for smaller DIY projects without equipment rental. I’d compare the total cost of achieving the same R-value rather than the package price alone.
4. Can I insulate my attic without a professional?
Yes, many homeowners can insulate a safe, accessible, unfinished attic themselves. However, suspected asbestos, unsafe electrical conditions, combustion appliances, and moisture-damaged structures require professional evaluation.
5. How much insulation should I put in my attic?
The correct amount depends on your climate, existing insulation, and local code requirements. ENERGY STAR recommendations for existing homes commonly range from R-30 to R-60 for previously uninsulated attics, depending on the climate zone.
6. Will insulating my attic reduce my electricity bill?
Improved attic insulation can reduce heating and cooling energy use, particularly when the existing insulation is inadequate and air leaks are sealed. Actual savings depend on your climate, HVAC equipment, energy prices, and the home’s overall condition.